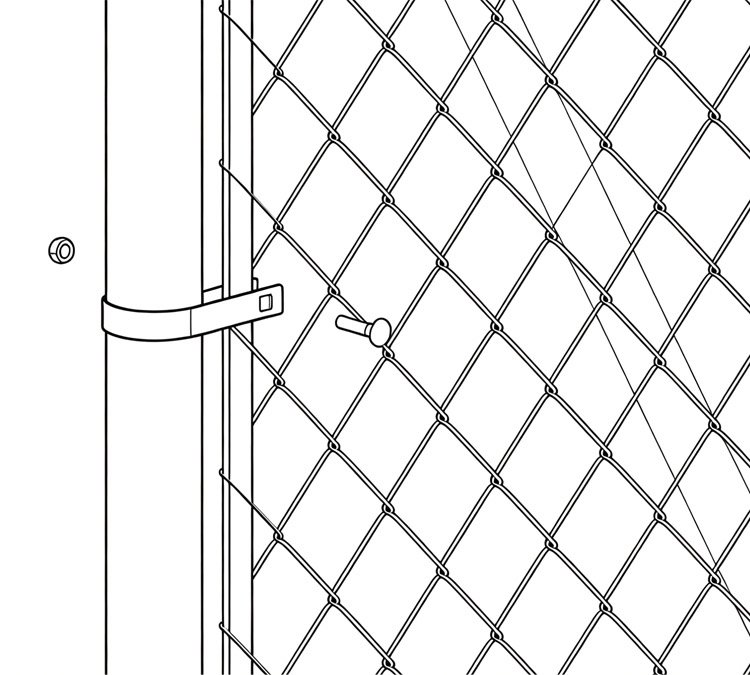
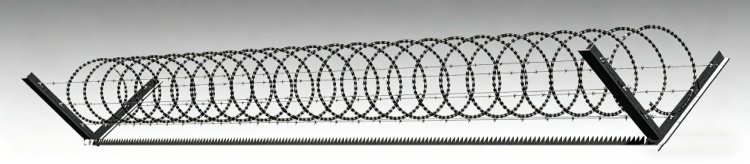
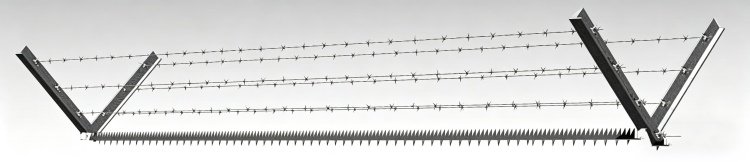
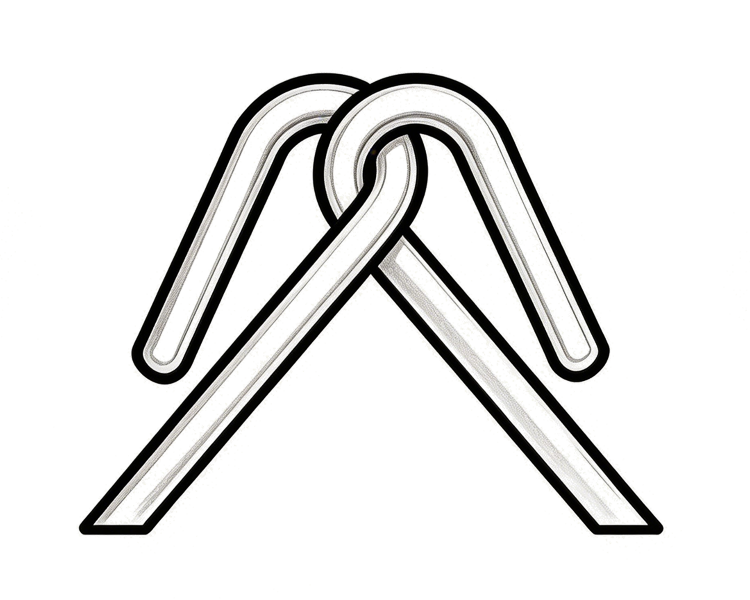
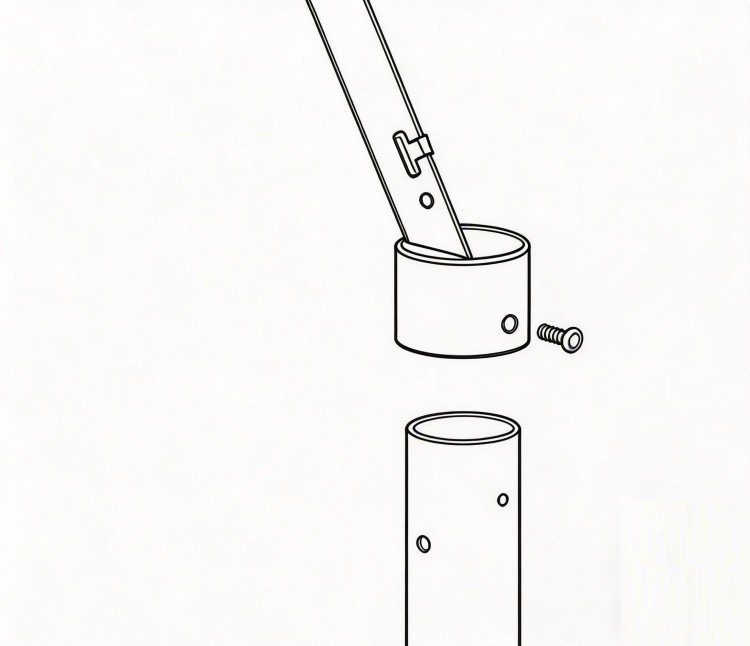
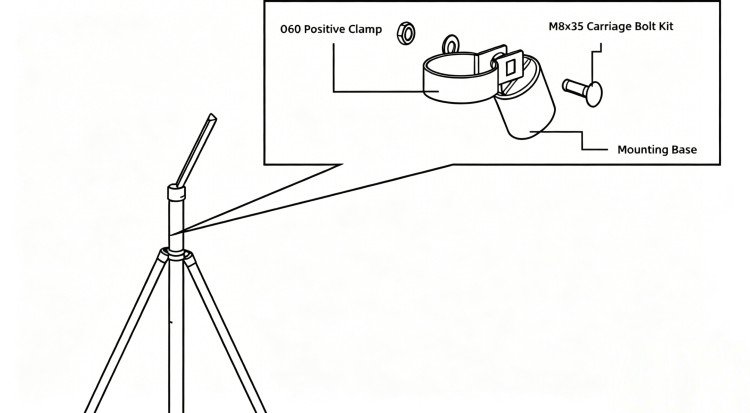
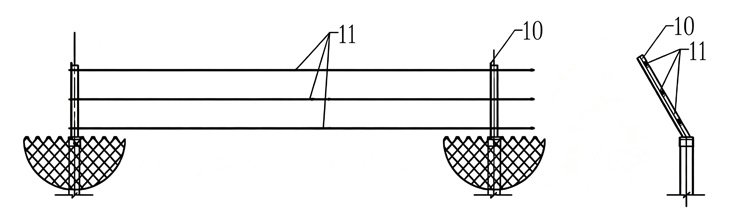
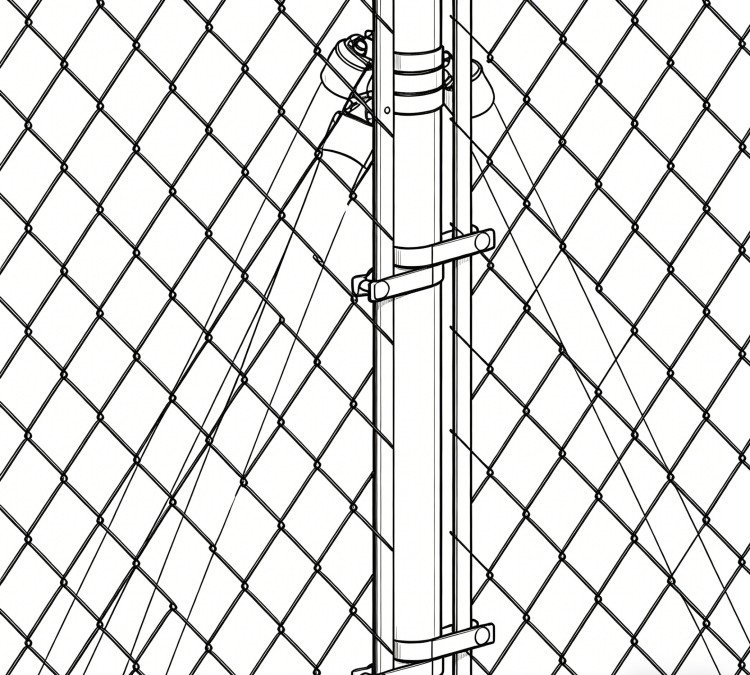
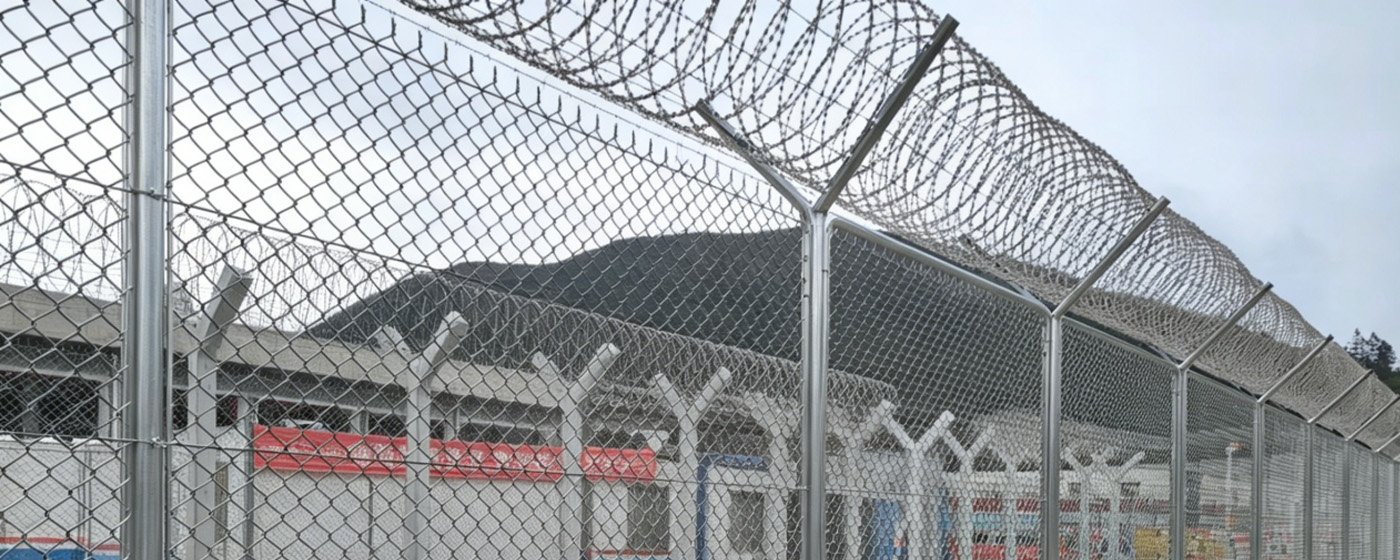
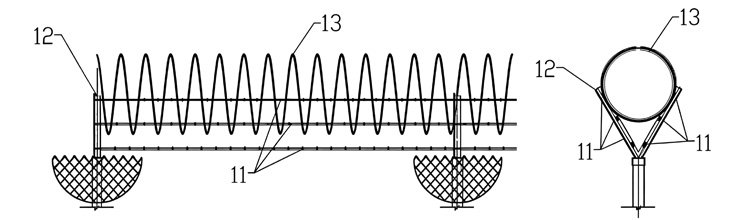
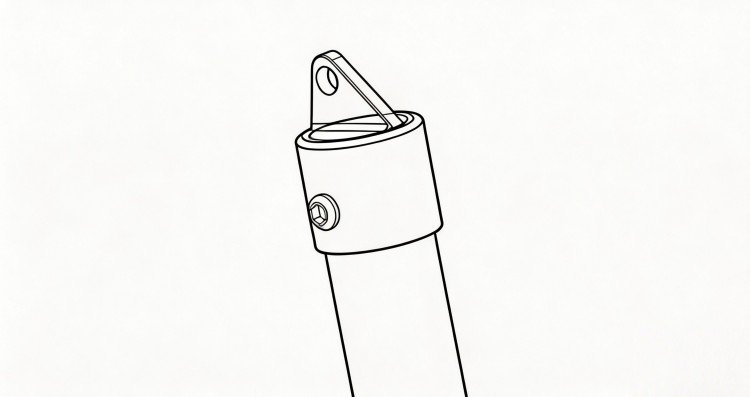
Fencing Overview
Chain Link Fence Elevation Drawing
Connection Assembly
Top Security Detail

1
Chain Link
2
Straining Post
3
Intermediate Posts
4
Strut
5
Stretcher Bar
6
Band Clamp
7
Line Wire
8
Stainless Steel Mesh Clip
9
Wire Ties
10
Steel Flat Extension Arm
11
Barbed Wire
12
Steel Flat Extension Arm
13
Concertina Razor Wire
Compliance with
| Standard | Specification |
| ASTM A392-11a | Standard Specification for Zinc-Coated Steel Chain-Link Fence Fabric |
| ASTM F1083-18 | Standard Specification for Pipe, Steel, Hot-Dipped Zinc-Coated (Galvanized) Welded, for Fence Structures |
| ASTM F626-14 | Standard Specification for Fence Fittings |
| ASTM A123 | Standard Specification for Zinc (Hot-Dip Galvanized) Coatings on Iron and Steel Products |
| EN ISO 1461 | Hot-dip galvanized coatings on fabricated iron and steel articles — Specifications and test methods |
| EN ISO 12944 | Paints and varnishes — Corrosion protection of steel structures by protective paint systems |
Chain link panel
chain-link fence fabric—a fencing material made from steel wire helically wound and interwoven in such a manner as to provide a continuous mesh without knots or ties except in the form of knuckling or of twisting the ends of the wires to form the selvage of the fabric. Variations to knuckled or twisted selvages are permissible.![]() |
![]() |
![]() |
![]() |
| Figure 1 — Mesh size | Figure 2 — Chain link fencing | Figure 3 — Knuckled ends | Figure 4 — Barbed ends |
| A distance measured at right angles. |
1.height 2.length |
Available Mesh Sizes,Zinc Coating Weights and Breaking Strength
| Specified Diameter of Coated Wire (in / mm) |
Mesh Sizes Class 1 1.20 oz/ft² (610) |
Mesh Sizes Class 2 2.00 oz/ft² (366) |
Breaking Strength lbf (N) |
| 0.192 (4.88) | 1 3/4 (45) and 2 (50) | 1 3/4 (45) and 2 (50) | 2170 (9650) |
| 0.148 (3.76) | 1 3/4 (45) and 2 (50) | 1 3/4 (45) and 2 (50) | 1290 (5740) |
| 0.120 (3.05) | 1 3/4 (45) and 2 (50) | 1 3/4 (45) and 2 (50) | 850 (3780) |
Typical dimensions for steel posts and struts
| Outside Diameter | Wall Thickness | Yield Strength | ||
| Schedule 80 | Schedule 40 | Schedule 80 psi (MPa) | Schedule 40 psi (MPa) | |
| 1.660 (42.2) | 0.191 (4.85) | 0.140 (3.56) | 30000 (205) | 50000 (344) |
| 1.900 (48.3) | 0.200 (5.08) | 0.145 (3.68) | 30000 (205) | 50000 (344) |
| 2.375 (60.3) | 0.218 (5.54) | 0.154 (3.91) | 30000 (205) | 50000 (344) |
| 2.875 (73.0) | 0.276 (7.01) | 0.203 (5.16) | 30000 (205) | 50000 (344) |
| 3.500 (88.9) | 0.300 (7.62) | 0.216 (5.49) | 30000 (205) | 50000 (344) |
| 4.500 (114.3) | 0.318 (8.08) | 0.226 (5.74) | 30000 (205) | 50000 (344) |
Surface anti-corrosion treatment
| Product | ISO 12944 | ||||
| C1 | C2 | C3 | C4 | C5 | |
| Class 1 | Class 2 | ||||
| Steel wire | 366 g/m² | 366 g/m² | 366 g/m² | 610 g/m² | 610 g/m² |
| Post | 400 g/m² | 490 g/m² | 550 g/m² | 610 g/m² | 610 g/m² |
One-Stop Fencing: Smart Design, Global Std
- Drawing Deepening Service: Our professional and highly efficient drawing deepening service has significantly reduced on-site adjustment time and errors.
- Custom Fencing Solutions: We offer comprehensive one-stop fencing customization services covering the entire process from design to precise construction.
- Material Optimization: We recommend optimal material solutions based on specific usage scenarios, striking a perfect balance between cost, durability, and performance.
Installation Method
Step 1: Assemble the Post Elbow Fittings
- Insert the post into the curved arm base sleeve to a depth of 35 mm.
- Secure it on both sides using M5.5 × 20 mm self-drilling countersunk screws.
Step 2: Assemble the Diagonal Bracing Connectors
- Insert the diagonal brace into the connector base sleeve.
- Secure it on one side using an M5.5 × 20 mm self-drilling countersunk screw.
Step 3: Install End Posts
- Install diagonal braces aligned with the fence installation axis at a height of 1.4 m above ground level, angled at 30° to the post.
- Install additional diagonal braces within the fence boundary, perpendicular to the fence installation axis, also at a height of 1.4 m and at a 30° angle to the post.
Step 4: Install Intermediate Posts
- Space intermediate posts at 2.5 m intervals from the end post, and install a total of 19 consecutive intermediate posts (all posts are interchangeable/universal).
Step 5: Install Reinforced (Braced) Posts
- Along the fence installation axis, install diagonal braces at a height of 1.4 m above ground level (two braces per side, vertically staggered), with one brace on each side of the post, angled at 30° to the post.
- Within the fence boundary and perpendicular to the fence installation axis, install diagonal braces at a height of 1.4 m above ground level, also at a 30° angle to the post.
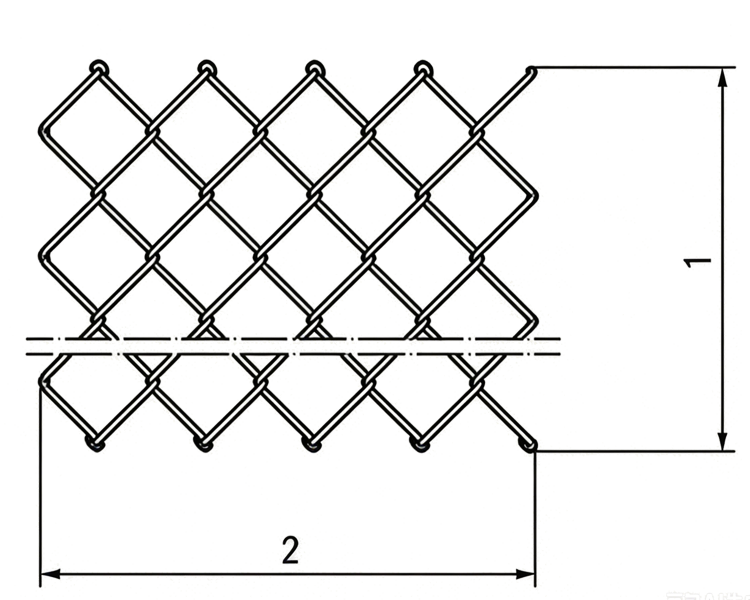
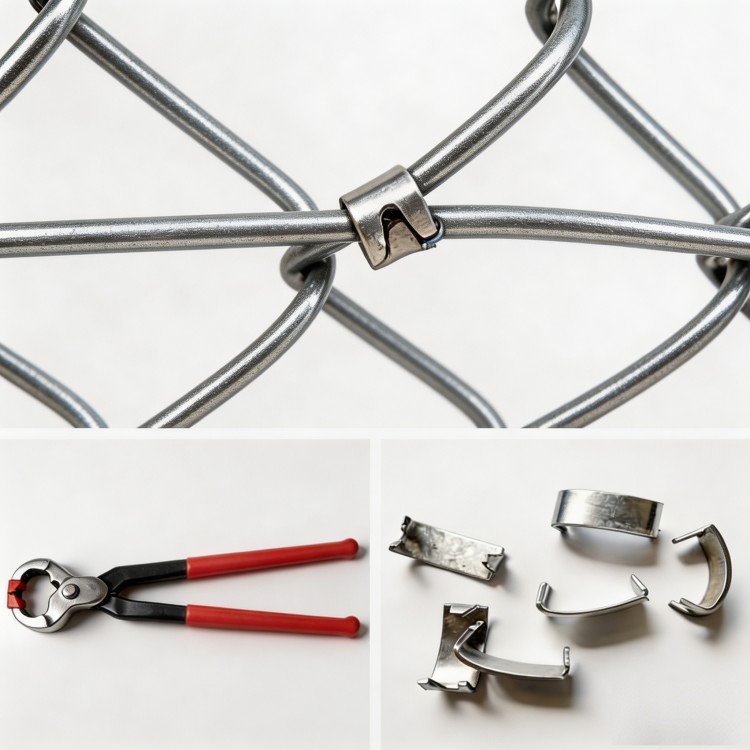
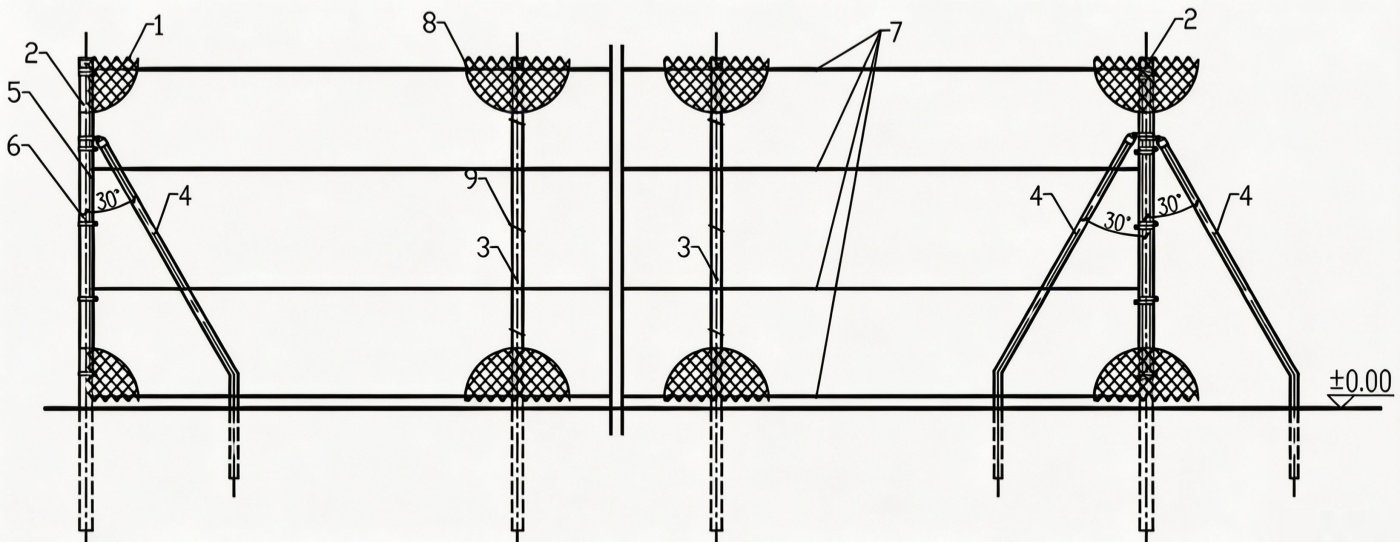
Step 6: Install the tension wire
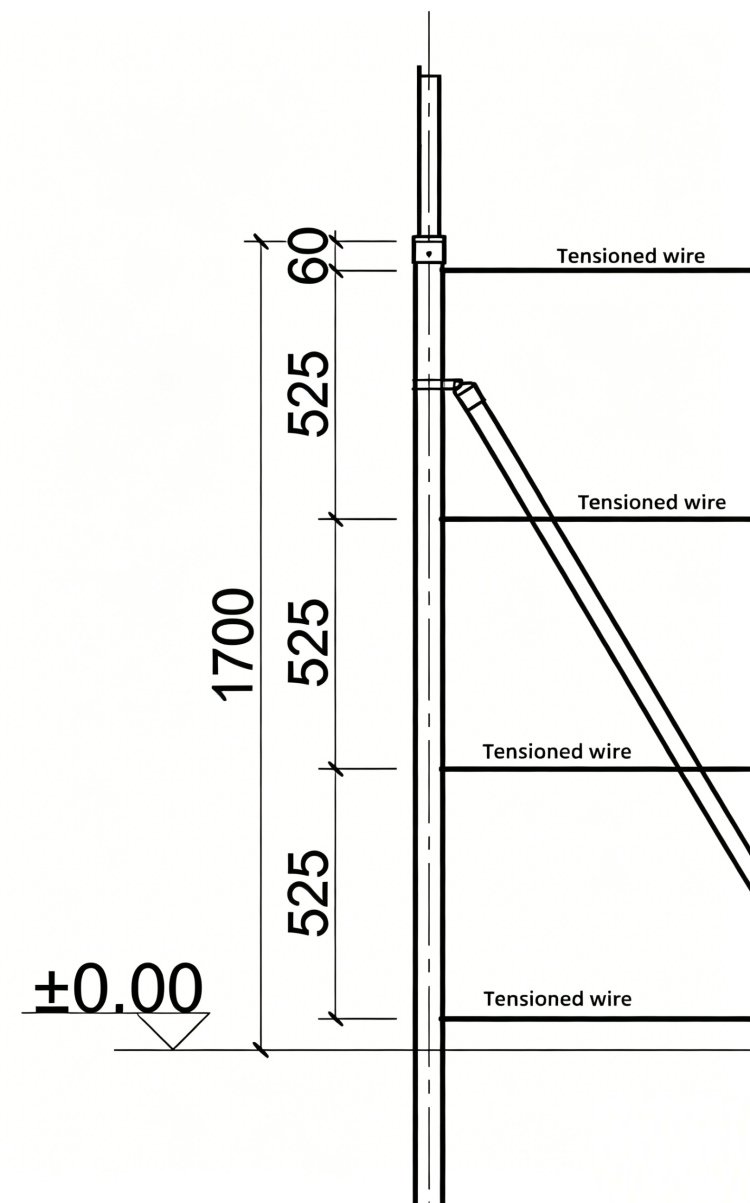
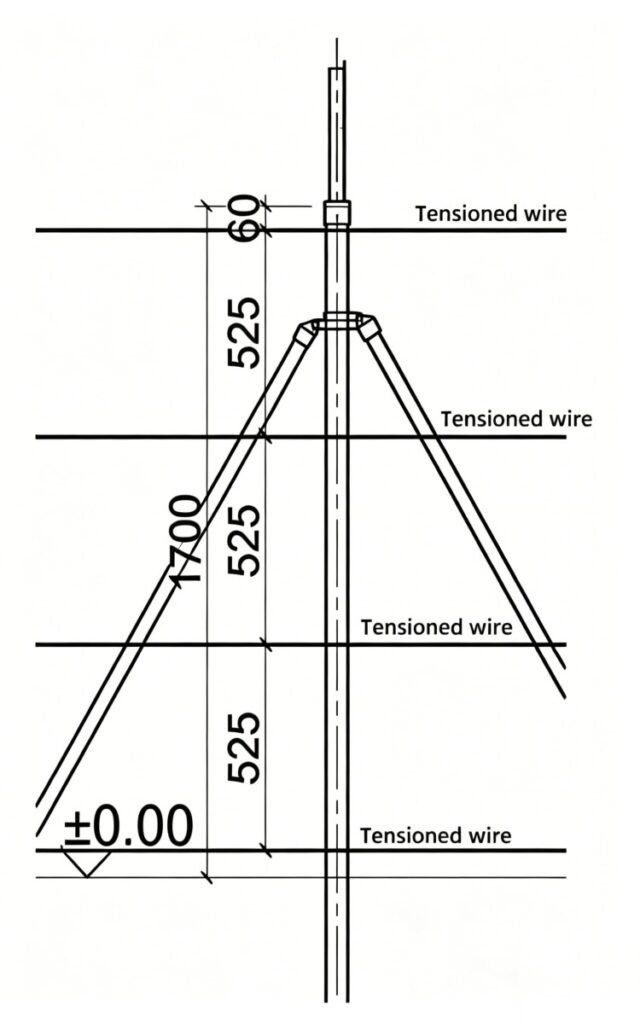
Secure the tension wire to end and reinforced posts.
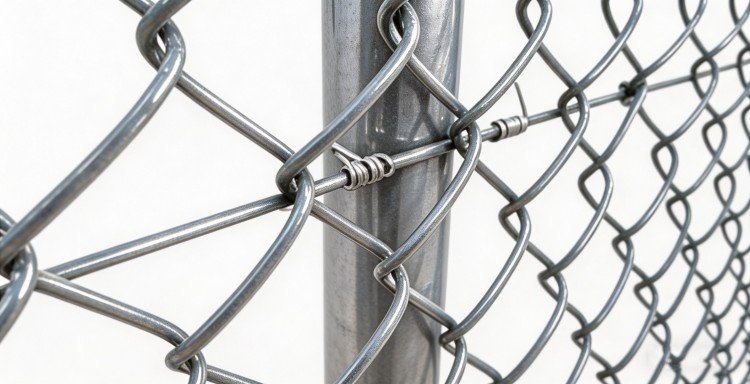
Secure the tension wire to intermediate posts.
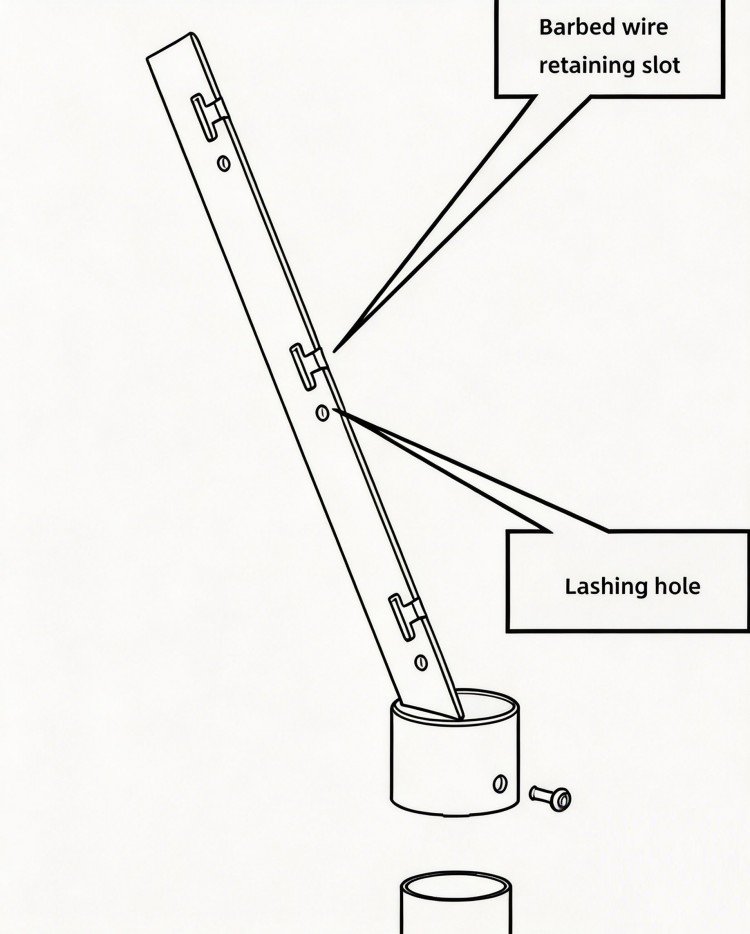
Step 7: Tension and secure the mesh panel
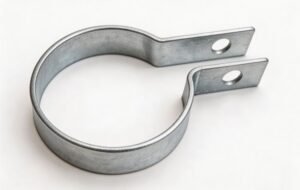
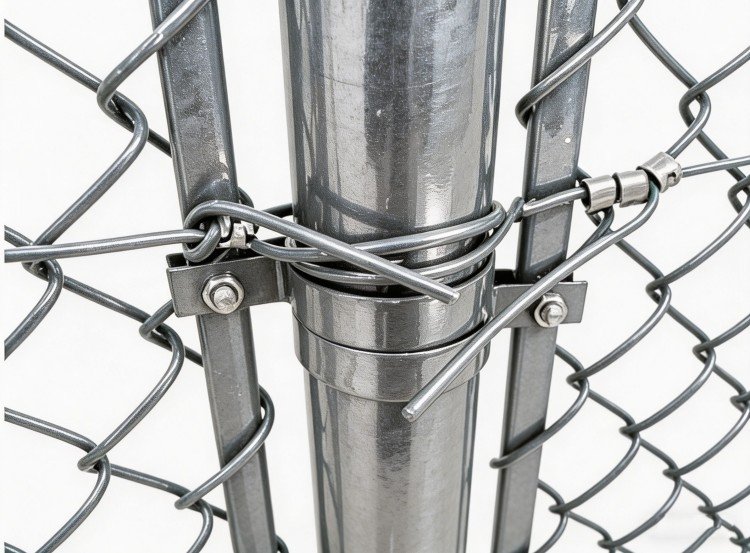
Offset clamp
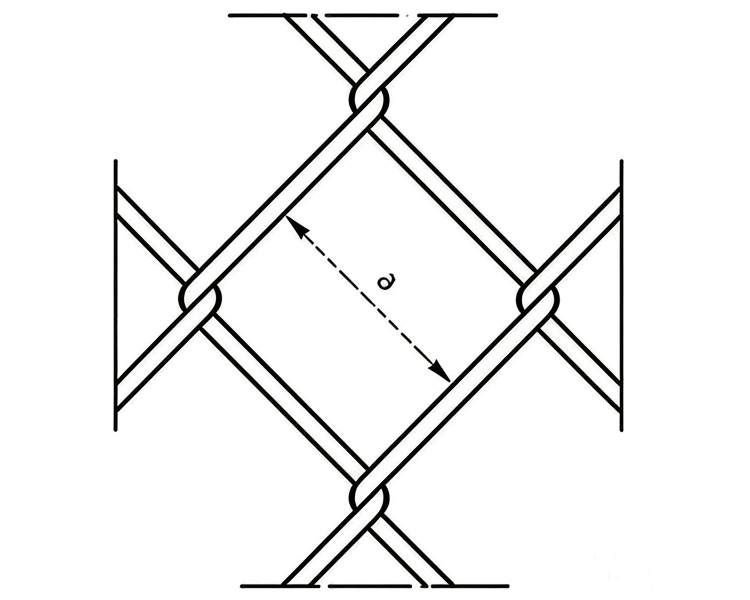
Five offset clamps are evenly spaced along both the end post and the reinforced post, through which the tensioned flat steel strap tightens the mesh panel.
Step 8: The mesh is secured to the tensioned wire using dedicated stainless steel clips
- which clamp the chain-link mesh firmly onto the tension wire.
- Six clips are evenly spaced across each 2.5-meter section of mesh.
Step 9: Barbed wire installation
- Each strand of barbed wire shall be seated into the dedicated barbed wire retaining slot in the post head and securely fastened by means of Ø1.0 mm stainless steel lashing wire through the lashing holes located at the base of the retaining slot.
Optional Accessaries
Applications


